Are you ready to take your streaming game to the next level? Connecting a camera to your PC for streaming can significantly enhance the quality and engagement of your content. In this article, I will guide you through the process of connecting your camera to a PC for seamless streaming. Get ready to captivate your audience like never before!
1. Introduction
A. Importance of connecting a camera to a PC for streaming
Imagine watching a stream with grainy visuals and poor image quality. Not exactly the immersive experience we all crave, right? By connecting a camera to your PC for streaming, you can elevate the visual appeal of your content, making it more professional and captivating. Your viewers will be able to see every detail, facial expression, and gesture, enhancing their connection with you.
B. Benefits of using a camera for streaming purposes
With the rise of live streaming platforms, creating high-quality content has become essential. Incorporating a camera into your streaming setup offers a myriad of benefits. Firstly, it allows you to present yourself visually, enabling viewers to connect on a more personal level. Secondly, a camera enhances the production value of your stream, making it more visually appealing and professional. Lastly, it opens up opportunities for creative expression, enabling you to experiment with different visual elements and engage your audience in new and exciting ways.
Now that we understand the significance of connecting a camera to a PC for streaming, let’s dive into the nitty-gritty details. In the following sections, we’ll explore how to choose the right camera, connect it to your PC, select the appropriate software, troubleshoot common issues, and more. Get ready to step up your streaming game and captivate your audience like never before!
2. Choosing the Right Camera for Streaming
When it comes to selecting a camera for streaming, you want to ensure that you make the right choice. A camera that meets your specific needs will contribute to the overall quality of your streams. Here are some factors to consider when choosing a camera:
A. Factors to consider when selecting a camera
-
Resolution and image quality: Crystal-clear visuals are essential for a captivating streaming experience. Look for cameras that offer high resolution, such as Full HD (1080p) or even 4K, to ensure your viewers can appreciate every detail.
-
Connectivity options: To connect your camera to your PC for streaming, it’s crucial to check the available connectivity options. USB connectivity is a common and convenient choice, allowing you to easily connect your camera to your PC without the need for additional equipment.
-
Low-light performance: Streaming in various lighting conditions is inevitable. Ensure your camera performs well in low-light environments, as this will prevent your stream from appearing grainy or pixelated.
B. Popular camera options suitable for streaming
-
DSLR cameras: DSLR cameras are a popular choice among streamers due to their exceptional image quality and versatility. They offer interchangeable lenses, allowing you to experiment with different focal lengths and achieve professional-looking shots. Additionally, many DSLR cameras have live view functionality, making them ideal for streaming.
-
Mirrorless cameras: Mirrorless cameras offer similar benefits to DSLRs, such as excellent image quality and the ability to change lenses. However, they are generally more compact and lighter, making them a convenient option for streamers on the go.
-
Webcams: If you’re just starting out or on a budget, webcams can be a viable option. They are easy to set up, typically offer decent image quality, and are specifically designed for streaming and video calling purposes. While webcams may not match the image quality of DSLRs or mirrorless cameras, they can still provide a satisfactory streaming experience.
Consider your streaming requirements, budget, and preferences when selecting a camera. Each type of camera has its own strengths, so choose the one that best aligns with your needs and goals. Remember, the camera you choose will play a significant role in the visual appeal of your streams, so choose wisely!
Connecting the Camera to a PC
A. Understanding the Necessary Equipment
To successfully connect your camera to a PC for streaming, it’s essential to have the right equipment at your disposal. Here are the key components you need to understand:
1. USB Cables
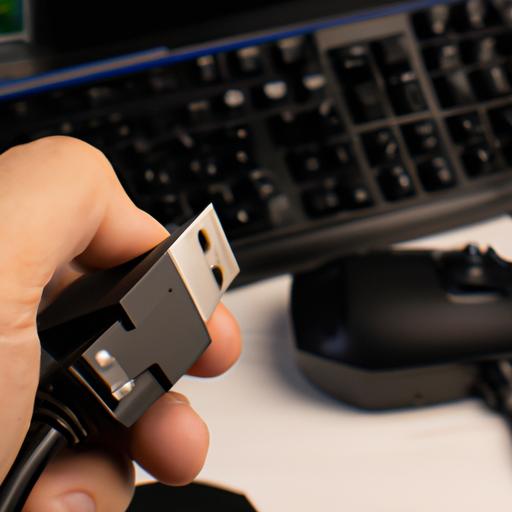
USB cables play a crucial role in establishing a connection between your camera and PC. Ensure that your camera is equipped with a USB port and check if it supports USB 2.0 or USB 3.0 for optimal data transfer speeds. Additionally, make sure you have a compatible USB cable that fits both your camera and PC ports.
2. Capture Cards
Capture cards act as intermediaries between your camera and PC, capturing the camera’s video feed and transmitting it to your computer for streaming. These devices come in various forms, such as external USB capture cards or internal PCIe capture cards, depending on your specific requirements and setup.
3. HDMI Cables
If you’re using a camera with HDMI output capabilities, HDMI cables are necessary to transmit high-definition video and audio signals from your camera to a capture card or directly to your PC. Ensure that the HDMI cable you choose supports the appropriate HDMI version and offers reliable connectivity.
B. Step-by-Step Guide to Connecting the Camera to a PC
Now that you have a good grasp of the necessary equipment, let’s walk through the process of connecting your camera to a PC for streaming:
1. Installing Necessary Drivers
Before connecting your camera to the PC, it’s crucial to install any required drivers. Check the manufacturer’s website or included documentation for the latest drivers specific to your camera model. Install the drivers on your PC to ensure proper recognition and functionality.
2. Choosing the Appropriate Cable
Depending on the available ports on your camera and PC, select the appropriate cable for connection. If your camera supports USB connectivity, use a USB cable. If you’re using a capture card, connect the camera’s HDMI output to the capture card’s HDMI input using an HDMI cable. Ensure all connections are secure.
3. Configuring Camera Settings
Once the physical connections are established, configure the camera settings to enable streaming. Access the camera’s menu or settings interface to adjust options such as resolution, frame rate, exposure, and autofocus. Make sure the camera is set to “Live View” or a similar mode suitable for streaming.
By following these steps, you’ll be well on your way to connecting your camera to a PC for streaming. Next, we’ll explore the software options available for an optimal streaming experience. Stay tuned!
4. Software for Camera Streaming
Streaming software plays a crucial role in connecting your camera to your PC and broadcasting your content to the world. Let’s explore the different software options available and how to set them up for optimal camera streaming.
A. Introduction to streaming software
When it comes to streaming software, several options are widely used and trusted by content creators. Let’s take a closer look at three popular choices:
1. OBS (Open Broadcaster Software)
OBS is a free and open-source streaming software known for its versatility and robust features. It supports various platforms and offers extensive customization options, making it a top choice for both beginners and experienced streamers.
2. XSplit Broadcaster
XSplit Broadcaster is a professional-grade streaming software that offers advanced features and seamless integration with popular streaming platforms. While it does have a paid version, the free version provides a solid foundation for high-quality camera streaming.
3. Streamlabs OBS
Streamlabs OBS (SLOBS) is a user-friendly streaming software that combines the power of OBS with the user-friendly interface of Streamlabs. It offers a range of templates, themes, and widgets to enhance your stream’s visual appeal and engagement.
B. Setting up the streaming software
Now that you have chosen the streaming software that suits your needs, let’s go over the essential steps to set it up for camera streaming.
1. Downloading and installing the software
Head to the official website of your chosen streaming software and download the appropriate version for your operating system. Once downloaded, follow the installation instructions provided by the software. Make sure to keep the software up to date to benefit from the latest features and bug fixes.
2. Configuring camera settings within the software
After installing the software, launch it and navigate to the settings menu. Look for the camera or video settings section and select your connected camera from the available options. Adjust the resolution, frame rate, and other settings according to your preferences and the capabilities of your camera.
3. Adjusting audio and video settings
To ensure a seamless streaming experience, configure the audio and video settings within the software. Set the desired bitrate, encoding options, and audio input sources. Test the settings by doing a trial stream or recording to ensure the audio and video are synchronized and of high quality.
By following these steps, you’ll be well on your way to harnessing the power of streaming software and unlocking the full potential of your camera for captivating and professional streaming experiences.
Troubleshooting Common Issues
Streaming can be a breeze, but occasionally, you may encounter some technical hiccups along the way. Don’t fret! In this section, I’ll guide you through common issues you may face when connecting your camera to a PC for streaming and provide effective troubleshooting solutions to keep your stream running smoothly.
5.1 Camera not recognized by the PC
It can be frustrating when your PC fails to recognize your camera. But fear not, as there are several steps you can take to resolve this issue and get back to streaming in no time.
-
Updating drivers: Ensure that you have the latest drivers installed for your camera. Visit the manufacturer’s website and download the updated drivers specific to your camera model. Once installed, restart your PC and reconnect your camera to see if it is recognized.
-
Checking cable connections: Sometimes, a loose or faulty connection can cause your camera to go unnoticed by your PC. Double-check all cable connections, including USB cables or HDMI cables, and ensure they are securely plugged into the appropriate ports. Try using different cables to rule out any cable-related issues.
-
Troubleshooting camera settings: Dive into your camera’s settings menu and ensure that it is set to the correct mode for streaming. Some cameras have specific settings for streaming, so make sure you have selected the appropriate option. Additionally, check if your camera requires any specific software or firmware updates for optimal compatibility with your PC.
5.2 Poor video quality or lagging issues
A visually appealing stream is essential for keeping your audience engaged. If you’re experiencing poor video quality or lagging, try these troubleshooting steps to enhance your streaming experience.
-
Adjusting camera settings: Experiment with different camera settings to optimize video quality. Adjust parameters such as exposure, white balance, and focus to ensure clear and vibrant visuals. Additionally, consider using a tripod or stabilizer to minimize shaky footage and enhance the overall viewing experience.
-
Optimizing streaming software settings: The streaming software you use plays a crucial role in delivering high-quality content. Explore the settings within your streaming software, such as OBS or XSplit Broadcaster, and make adjustments to optimize video encoding, bitrate, and resolution settings. Finding the right balance can significantly improve the quality of your stream.
-
Upgrading hardware if necessary: If you’ve tried all the software optimizations and are still experiencing lag or poor video quality, it may be time to consider upgrading your hardware. Check your PC’s specifications and ensure it meets the minimum requirements for streaming. Investing in a more powerful processor, additional RAM, or a dedicated graphics card can drastically improve streaming performance.
By following these troubleshooting steps, you can overcome common issues and ensure a seamless streaming experience. Remember, perseverance is key, and with a little troubleshooting, you’ll be back to streaming like a pro in no time!
Conclusion
In conclusion, connecting a camera to your PC for streaming is a game-changer in the world of content creation. By harnessing the power of high-quality visuals, you can create a more immersive and professional streaming experience for your audience.
Throughout this article, we’ve explored the importance of connecting a camera to a PC for streaming and the myriad benefits it brings. From enhancing visual quality to fostering a deeper connection with your viewers, a camera opens up a world of possibilities for content creators.
Remember, when choosing a camera, consider factors such as resolution, connectivity options, and low-light performance to ensure optimal results. With the right equipment and software, you can seamlessly connect your camera to your PC and unlock its full potential for streaming.
In case you encounter any issues, don’t worry! Troubleshooting common problems such as unrecognized cameras or poor video quality is part of the process. By following the steps outlined in this article and seeking further assistance if needed, you’ll be able to overcome any challenges and continue delivering top-notch streaming content.
So, what are you waiting for? Connect your camera to your PC, equip yourself with the right software, and let your creativity soar. Your audience is eagerly waiting for an unforgettable streaming experience. Happy streaming!
“A camera is not just a tool; it’s a portal through which your viewers can enter your world.” – Unknown


